This is a recommends products dialog
Top Suggestions
Starting at
View All >
Language
French
English
ไทย
German
繁體中文
Country
Hi
All
Sign In / Create Account
language Selector,${0} is Selected
Register & Shop at Lenovo Pro
Register at Education Store
Pro Tier Benefits
• Save up to an extra 5% on Think everyday pricing• Spend PHP$300,000, advance to Plus Tier with increased benefits
Plus Tier Benefits
• Save up to an extra 8% on Think everyday pricing• Spend PHP$1,000,000, advance for free to Elite Tier with increased benefits
• Take advantage of flexible payment options with TruScale Device as a Service.
Elite Tier Benefits
• Save up to an extra 12% on Think everyday pricing• Take advantage of flexible payment options with
TruScale Device as a Service.
Reseller Benefits
• Access to Lenovo's full product portfolio
• Configure and Purchase at prices better than Lenovo.com
• Access to Lenovo's full product portfolio
• Configure and Purchase at prices better than Lenovo.com
View All Details >
more to reach
PRO Plus
PRO Elite
Congratulations, you have reached Elite Status!
Pro for Business


TEMPORARILY UNAVAILABLE
DISCONTINUED
Temporary Unavailable
Cooming Soon!
. Additional units will be charged at the non-eCoupon price. Purchase additional now
We're sorry, the maximum quantity you are able to buy at this amazing eCoupon price is
Sign in or Create an Account to Save Your Cart!
Sign in or Create an Account to Join Rewards
View Cart
Wow, your cart is empty!
Remove
items in cart
Fill it in with great deals
Some items in your cart are no longer available. Please visit cart for more details.
has been deleted
Please review your cart as items have changed.
of
Contains Add-ons
Proceed to Checkout
Yes
No
Popular Searches
What are you looking for today ?
Quick Links
Recent Searches
Hamburger Menu
-
Lenovo Pro Business Store{{loyaltyMsg}}
Lenovo Pro Business Store
Lenovo Pro Business Store -
Lenovo Education{{loyaltyMsg}}
Lenovo Education
Lenovo Education -
WishList
 WishList
 -
Contact Us
{{contactNumber}}
Contact Us
Sales:
option #1 for BUSINESS:
option #2 for HOME:
Order Support:
-
Lenovo Pro Business Store{{loyaltyMsg}}
Lenovo Pro Business Store
Lenovo Pro Business Store -
Lenovo Education{{loyaltyMsg}}
Lenovo Education
Lenovo Education -
WishList
WishList
-
Contact Us
{{contactNumber}}
Contact Us
Sales:
option #1 for BUSINESS:
option #2 for HOME:
Order Support:
-
Lenovo Pro Business Store{{loyaltyMsg}}
Lenovo Pro Business Store
Lenovo Pro Business Store -
Lenovo Education{{loyaltyMsg}}
Lenovo Education
Lenovo Education -
WishList
WishList
-
Contact Us
{{contactNumber}}
Contact Us
Sales:
option #1 for BUSINESS:
option #2 for HOME:
Order Support:
-
Lenovo Pro Business Store{{loyaltyMsg}}
Lenovo Pro Business Store
Lenovo Pro Business Store -
Lenovo Education{{loyaltyMsg}}
Lenovo Education
Lenovo Education -
WishList
WishList
-
Contact Us
{{contactNumber}}
Contact Us
Sales:
option #1 for BUSINESS:
option #2 for HOME:
Order Support:

skip to main content
-
Account{{userInfo.userNameAbb || ''}}Hi , {{userInfo.firstName}}!
Sign In / Create Account
Account
Sign in / Create Account
Keep track of your wishlist, orders, and My Lenovo rewards, all in one place

Access your orders, subscriptions, saved carts, rewards balance, and profile

Create a wishlist of your favorite products

View & track your orders
Register your product and/or update your warranty dates
Sign out
-
Cart
{{cartCount}}
Cart
-
Account{{userInfo.userNameAbb || ''}}Hi , {{userInfo.firstName}}!
Sign In / Create Account
Account
Sign in / Create Account
Keep track of your wishlist, orders, and My Lenovo rewards, all in one place
Access your orders, subscriptions, saved carts, rewards balance, and profile
Create a wishlist of your favorite products
View & track your orders
Register your product and/or update your warranty dates
Sign out
-
Cart
{{cartCount}}
Cart
-
SALE
-
Popular DealsFlash Sale Laptop Sale Gaming Sale Desktop Sale Powerful Workstations Deals on Monitors Accessories Sale Tablets Sale Deals on Customisable PCs View All Offers
-
Additional OffersThinkPad Deals Yoga Deals IdeaPad Deals ThinkBook Deals ThinkCentre Deals Intel PC Deals AMD PC Deals Yoga + IdeaPad Offers
-
Weekly Flash DealsWeekly PC Deals Student Offers Offers on Lenovo Pro Quickship Sale Bundled Offers Clearance New Arrivals
-
-
Ready to Deliver
-
Laptops
-
Laptops by UseBusiness Laptops Gaming Laptops Student LaptopsExplore Laptops2-in-1 Laptops New Arrivals Workstation Laptops Laptops for Everyday Use Touchscreen Laptops Windows 11 PCs Laptop Deals Customisable Laptops View All Laptops
-
By BrandThinkPad Yoga ThinkBook Legion IdeaPad LOQ GamingAI PCsAI PC Copilot+ PCs AI-Powered Gaming PCs
-
Trending NowThinkPad P16s Gen 3 (16″ Intel) ThinkPad P1 Gen 7 (16″ Intel) ThinkPad P14s Gen 5 (14 inch Intel) ThinkPad T14 Gen 5 14" AMD ThinkPad X1 Carbon Gen 12 ThinkPad X1 2-in-1 Gen 9 ThinkPad T14s Gen 5 ThinkPad T16 Gen 3 Yoga Slim 7i Gen 9 YogaBook 9i Gen 9 Legion Pro 5i Gen 9 ThinkPad E14 Gen 5 ThinkPad E16 Gen 2 IdeaPad Slim 3i
-
By SeriesThinkPad E Series ThinkPad X1 Series ThinkPad P Series ThinkPad Z Series Legion 5 Series Legion Pro Series Yoga 2-in-1 Series Yoga Pro Series ThinkPad L Series ThinkPad T Series
-
-
Desktops
-
Explore DesktopsBusiness Desktops Everyday Desktops Gaming Desktops Tiny Desktops All-in-ones Desktops Sale Find My Desktop View All Desktops
-
By BrandThinkCentre ThinkCentre Neo Series ThinkStation Workstations Legion Towers IdeaCentre
-
Trending NowThinkCentre M75q Gen 5 Tiny (AMD) ThinkCentre Neo 50a Gen 5 ThinkCentre Neo 50s Gen 4 ThinkCentre Neo 50t Gen 4 Tower ThinkCentre Neo 50q Gen 4 Tiny ThinkCentre M70s Gen 4 ThinkCentre M90a Gen 5 ThinkCentre M90q Gen 4 Tiny Legion 5i Tower Gen 8 Legion 7i Tower Gen 8
-
-
Workstations
-
Explore WorkstationsMobile Workstations AI-Ready Workstations Desktop Workstations ThinkStation P Series Workstations Workstation Deals Find My Workstation View All Workstations
-
By BrandThinkPad ThinkStation
-
Mobile WorkstationsThinkPad P16s Gen 3 (16″ Intel) ThinkPad P14s Gen 5 (14 inch Intel) ThinkPad P1 Gen 7 (16″ Intel) ThinkPad P14s Gen 4 ThinkPad P16s Gen 2 ThinkPad P16v Gen 1 ThinkPad P1 Gen 6 ThinkPad P16 Gen 2 ThinkPad P16s Gen 2 AMD
-
Desktop WorkstationsThinkStation P3 Tiny ThinkStation P3 Ultra ThinkStation P3 Tower ThinkStation P5 Tower ThinkStation P7 Tower ThinkStation PX Tower ThinkStation P620 Tower
-
-
Gaming
-
Explore Lenovo GamingGaming Laptops Gaming Desktops Gaming Accessories Gaming Monitors Customisable Gaming PCs Gaming Deals Lenovo Legion Lenovo LOQ View All Gaming PCs
-
Gaming Accessories & PC GamesGaming Headsets Keyboards & Mice Gaming Monitors Gaming Backpacks All Gaming Accessories SEGA Exclusive Deals PC Games : FREE XBOX Gamepass PC Games : 12 Mos. Utomik Pass
-
-
Tablets
-
Explore TabletsAndroid Tablets Tablet Accessories Deals on Tablets & Phones Find My Tablet View All Tablets
-
Tablets By UseTablets for Kids Tablets for Gaming Business Tablets
-
Trending TabletsTab M9 LTE+WIFI - Grey Tab M11 LTE+WIFI - Grey Tab P12 WIFI - Grey + Keyboard + Pen
-
-
Monitors
-
Explore MonitorsBusiness Monitors Monitors for Work Monitors for Home Monitors for Gaming Portable Monitors Docking Monitors Monitor Accessories Deals on Monitors ThinkVision Monitors View All Monitors
-
Shop By Screen Size31" or More 27" - 28" Monitors 23" - 24" Monitors Less than 23" 29" or More
-
By Resolution & Shape4K - Best QHD - Better FHD - Good Curved Monitors QHD Monitors FHD Monitors Docking Monitors
-
Trending MonitorsThinkVision P27h QHD ThinkVision S27i FHD ThinkVision T24i FHD ThinkVision T27h QHD Legion Y27 Gaming Monitor
-
Portable MonitorsThinkVision M14 FHD ThinkVision M15 FHD Lenovo L15 FHD
-
-
Accessories
-
Support
-
Customer SupportSales Update drivers Search solutions Download manuals
-
Customer SupportEmail Support Order Visibility Portal Online Chat Premier Support Call Me Back PremiumCare
-
Technical SupportPC Technical Support Premier Support Warranty Lookup Check Repair Status Forums Contact Us
-
-
AI
-
Explore AI PCsCopilot+PC AI PC AI-Powered Gaming PCs AI-Ready Workstations View all AI PCs
-
Solutions & ResourcesHybrid AI Smarter AI for All Infrastructure Solutions from Lenovo
-
Trending AI PCsThinkPad E14 Gen 6 Yoga 7i 2-in-1 Gen 9 ThinkPad P16s Gen 3 Legion 5i Gen 9
-
-
Learn
-
Industry TrendsHybrid AI Cloud Computing Data Management Edge Computing Infrastructure Service
-
Partners/AlliancesAMD Solutions Intel Solutions Microsoft Solutions Nutanix Solutions NVIDIA Solutions Red Hat Solutions SAP Solutions VMware Solutions
-
ResourcesSmarter infrastructure stories Lenovo Press Lenovo Xperience Newsroom
-
-
Solutions
-
Explore SolutionsBackup & Disaster Recovery Big Data & Analytics Business Applications Client Virtualization & Infrastructure Cloud Service Provider
-
More SolutionsDatabase DevOps Edge-AI High-Performance Computing Hybrid Cloud Lenovo Value Recovery OEM
-
Business SolutionsSAP Small and Medium Business Storage Solutions Telco Infrastructure Services Shop All Solutions
-
ResourcesSmarter infrastructure stories Lenovo Partner Hub
-
-
Servers
-
Explore by ProcessorAMD Servers Intel Servers
-
Explore ServersRack Servers Tower Servers Edge Servers High-Density Servers Mission Critical Servers Options & Accessories
-
-
Storage
-
Explore StorageUnified Storage Storage-Area Network Direct-Attached Storage Tape Storage
-
ResourcesOptions & Accessories
-
-
Software-Defined Infrastructure
-
Software
-
Explore SoftwareInfrastructure Management Cloud Marketplace
-
-
AI
-
Warranty Lookup
-
PC Services
-
Support ServicesPremier Support Plus Premier Support Premium Care Plus Premium Care Legion Ultimate Support Replacement Parts Store Lifecycle Warranty & Protection CO2 Offset Services Lenovo Live Assistant
-
Deployment ServicesPlanning & Optimization Asset Management Customization Post Deployment
-
Managed ServicesDevice as a Service (DaaS) Smart Lock Sustainability Services Asset Recovery CO2 Offset Services
-
-
Data Center Services
-
Solutions
-
Product SolutionsAR/VR Smart Edge Workplace Solutions OEM Solutions Smart Collaboration Digital Workplace Solutions Lenovo Certified Refurbished Explore More
-
Solutions by TopicBig Data Cloud Employee Experience Productivity Remote Working Explore More
-
Solutions by IndustryEducation Financial Services Public Administration Explore More
-
-
Support
-
Customer SupportHelp Placing an Order Warranty Extensions Order Replacement Parts Shopping Help
-
Order SupportExisting Order Help Check Order Status Lenovo Return Policy
-
Technical SupportPC Support Data Center Support Smart Devices Support Motorola Mobile Support Forums All Technical Support
-
{"arrowColor":"#000000","backgroundColor":"#e6f4fa","sideMsg":"","data":[{"pcInfo":"","mAndTabInfo":"","bannerInfo":{"t_id":"Page48d1b0f3-f9f6-4d26-bfb6-fc27519fc6b6","language":{"en":"","en_ph":"%3Cp%20style%3D%22text-wrap%3A%20wrap%3B%22%3E%3Cspan%20style%3D%22color%3A%20rgb(0%2C%200%2C%200)%3B%22%3EJoin%20Lenovo%20Pro%20for%20up%20to%2010%25%20Welcome%20Discount.%3C%2Fspan%3E%3C%2Fp%3E%3Cp%20style%3D%22text-wrap%3A%20wrap%3B%22%3E%3Cspan%20style%3D%22color%3A%20rgb(0%2C%200%2C%200)%3B%22%3ECall%201800-1601-0084.%26nbsp%3B%20%26nbsp%3B%20%26nbsp%3B%26nbsp%3B%26nbsp%3B%3C%2Fspan%3E%3Ca%20href%3D%22%2Fbusiness%2Fbenefits%2F%3FipromoID%3Dhellobar_01_lpro_register%22%20target%3D%22_blank%22%20textvalue%3D%22JOIN%20FOR%20FREE%22%20style%3D%22text-decoration%3A%20underline%3B%20color%3A%20rgb(0%2C%200%2C%200)%3B%22%3E%3Cspan%20style%3D%22color%3A%20rgb(0%2C%200%2C%200)%3B%22%3E%3Cstrong%3EJoin%20For%20Free%3C%2Fstrong%3E%3C%2Fspan%3E%3C%2Fa%3E%3C%2Fp%3E"},"id":"Page48d1b0f3-f9f6-4d26-bfb6-fc27519fc6b6"},"gInfo":""},{"pcInfo":"","mAndTabInfo":"","bannerInfo":{"t_id":"Pagea50c72d5-f77c-434c-b047-2b8de53cfa7a","language":{"en":"","en_ph":"%3Cp%20style%3D%22text-wrap%3A%20wrap%3B%22%3E%3Cspan%20style%3D%22color%3A%20rgb(0%2C%200%2C%200)%3B%22%3E%3Cstrong%3E%3C%2Fstrong%3EJoin%20Lenovo%20Edu%20and%20enjoy%20up%20to%20PHP5%2C800%20Welcome%20Discount%26nbsp%3B%3C%2Fspan%3E%3C%2Fp%3E%3Cp%20style%3D%22text-wrap%3A%20wrap%3B%22%3E%3Cspan%20style%3D%22color%3A%20rgb(0%2C%200%2C%200)%3B%22%3ECall%201800-1601-0084.%26nbsp%3B%26nbsp%3B%26nbsp%3B%26nbsp%3B%26nbsp%3B%3C%2Fspan%3E%3Ca%20href%3D%22%2Flenovo-edu%2Fstudent%2Fbenefits%2F%3FipromoID%3Dhellobar_02_edu%22%20target%3D%22_blank%22%20textvalue%3D%22JOIN%20FOR%20FREE%22%20style%3D%22text-decoration%3A%20underline%3B%20color%3A%20rgb(0%2C%200%2C%200)%3B%22%3E%3Cspan%20style%3D%22color%3A%20rgb(0%2C%200%2C%200)%3B%22%3E%3Cstrong%3EJoin%20For%20Free%3C%2Fstrong%3E%3Cstrong%3E%3C%2Fstrong%3E%3C%2Fspan%3E%3C%2Fa%3E%3C%2Fp%3E"},"id":"Pagea50c72d5-f77c-434c-b047-2b8de53cfa7a"},"gInfo":""},{"pcInfo":"","mAndTabInfo":"","bannerInfo":{"t_id":"Pageb9db103c-01b1-4221-bb07-d859c8a4d978","language":{"en":"","en_ph":"%3Cp%20style%3D%22text-wrap%3A%20wrap%3B%22%3E%3Cstrong%3E%3Cspan%20style%3D%22color%3A%20rgb(0%2C%200%2C%200)%3B%22%3EShopping%20Fest%3C%2Fspan%3E%3C%2Fstrong%3E%3Cspan%20style%3D%22color%3A%20rgb(0%2C%200%2C%200)%3B%22%3E%20%7C%26nbsp%3B%3C%2Fspan%3E%3Cspan%20style%3D%22text-wrap%3A%20nowrap%3B%22%3E%3C%2Fspan%3EExplore%20latest%20PC%20deals%20from%20ThinkPad%2C%20Yoga%2C%20Legion%20and%20more!%26nbsp%3B%3C%2Fp%3E%3Cp%20style%3D%22text-wrap%3A%20wrap%3B%22%3E%3Ca%20href%3D%22%2Fd%2Fdeals%2Fonline-exclusive%2F%3FipromoID%3Dhellobar_03_main_dlp%22%20target%3D%22_blank%22%20textvalue%3D%22Shop%20Now%22%20style%3D%22color%3A%20rgb(0%2C%200%2C%200)%3B%20text-decoration%3A%20underline%3B%22%3E%3Cspan%20style%3D%22color%3A%20rgb(0%2C%200%2C%200)%3B%22%3E%3Cstrong%3EShop%20Now%3C%2Fstrong%3E%3Cstrong%3E%3C%2Fstrong%3E%3C%2Fspan%3E%3C%2Fa%3E%3C%2Fp%3E"},"id":"Pageb9db103c-01b1-4221-bb07-d859c8a4d978"},"gInfo":""},{"pcInfo":"","mAndTabInfo":"","bannerInfo":{"t_id":"Pagec4c4f98c-ed8d-4a1e-9725-925c01bd5093","language":{"en":"","en_ph":"%3Cp%3E%3Cspan%20style%3D%22text-wrap%3A%20wrap%3B%20color%3A%20rgb(0%2C%200%2C%200)%3B%22%3EThe%20all-new%20ThinkPad%20X1%20Carbon%20Gen%2012%20and%20X1%202-in-1%20laptops.%20Get%20backpack%20and%20mouse%20at%20PH1%20with%20PC%20purchase.%26nbsp%3BCall%20our%20Toll%20Free%20%23%201800-1601-0084%26nbsp%3B%20%26nbsp%3B%3Ca%20href%3D%22%2Fp%2Flaptops%2Fthinkpad%2Fthinkpadx1%2Fthinkpad-x1-carbon-gen-12-(14-inch-intel)%2Flen101t0083%3FipromoID%3Dhellobar_X1%20Carbon%20Gen%2012_promo%22%20target%3D%22_self%22%20textvalue%3D%22Shop%20Now%22%20style%3D%22text-decoration%3A%20underline%3B%20text-wrap%3A%20wrap%3B%20color%3A%20rgb(0%2C%200%2C%200)%3B%22%3E%3Cspan%20style%3D%22text-wrap%3A%20wrap%3B%20color%3A%20rgb(0%2C%200%2C%200)%3B%22%3E%3Cstrong%3EShop%20Now%3C%2Fstrong%3E%3C%2Fspan%3E%3C%2Fa%3E%26nbsp%3B%20%26nbsp%3B%3Ca%20href%3D%22%2Fd%2Fdeals-and-coupons%2Fnew-arrivals%2F%3FipromoID%3Dhellobar_New_Arrivals%22%20target%3D%22_self%22%20style%3D%22color%3A%20rgb(0%2C%200%2C%200)%3B%20text-decoration%3A%20underline%3B%22%3E%3Cspan%20style%3D%22text-wrap%3A%20wrap%3B%20color%3A%20rgb(0%2C%200%2C%200)%3B%22%3E%3Cstrong%3EAll%20New%20Arrivals%3C%2Fstrong%3E%3C%2Fspan%3E%3C%2Fa%3E%3C%2Fspan%3E%3C%2Fp%3E"},"id":"Pagec4c4f98c-ed8d-4a1e-9725-925c01bd5093"},"gInfo":""},{"pcInfo":"","mAndTabInfo":"","bannerInfo":{"t_id":"Pagea28f9226-5a04-4fa0-ac10-8e2c9c02b652","language":{"en":"","en_ph":"%3Cp%3E%3Cstrong%20style%3D%22text-wrap%3A%20wrap%3B%22%3EOffer%20on%20Software%3C%2Fstrong%3E%3Cspan%20style%3D%22text-wrap%3A%20wrap%3B%22%3E%26nbsp%3B%7C%26nbsp%3BUp%20to%2030%25%20off%20Microsoft%20365%20Personal%20with%20selected%20laptops.%20Offer%20expires%2031st%20July.%26nbsp%3B%3C%2Fspan%3E%3Ca%20href%3D%22%2Flaptops%2Fresults%2F%3FvisibleDatas%3D8481%253ALegion%252520Go%252520Series%252CLegion%252520Pro%252520Series%252CYoga%252520Pro%252520Series%252CThinkPad%252520Z%252CYoga%2525202-in-1%252520Series%252CYoga%252520Slim%252520Series%252CThinkPad%252520X%252520Series%252CThinkPad%252520T%252520Series%252CThinkPad%252520P%252520Series%252CLegion%2525209%252520Series%252CLegion%2525207%252520Series%252CLegion%2525205%252520Series%22%20target%3D%22_self%22%20textvalue%3D%22Shop%20Now%22%20style%3D%22color%3A%20rgb(0%2C%200%2C%200)%3B%20text-decoration%3A%20underline%3B%22%3E%3Cspan%20style%3D%22color%3A%20rgb(0%2C%200%2C%200)%3B%22%3E%3Cstrong%3EShop%20Now%3C%2Fstrong%3E%3C%2Fspan%3E%3C%2Fa%3E%3C%2Fp%3E"},"id":"Pagea28f9226-5a04-4fa0-ac10-8e2c9c02b652"},"gInfo":""}],"autoRun":true,"displayTerminal":"pc,tablet,mobile"}
Join Lenovo Pro for up to 10% Welcome Discount.
Call 1800-1601-0084. Join For Free
Join Lenovo Edu and enjoy up to PHP5,800 Welcome Discount
Call 1800-1601-0084. Join For Free
Shopping Fest | Explore latest PC deals from ThinkPad, Yoga, Legion and more!
The all-new ThinkPad X1 Carbon Gen 12 and X1 2-in-1 laptops. Get backpack and mouse at PH1 with PC purchase. Call our Toll Free # 1800-1601-0084 Shop Now All New Arrivals
Offer on Software | Up to 30% off Microsoft 365 Personal with selected laptops. Offer expires 31st July. Shop Now

100% Genuine Products. Philippines Business Registration. Trusted by customers. Check our Credentials
/d/deals/time-sale/?ipromoID=hp_slimbar_timesale
TIME SALE Get extra discounts off selected products from Midnight-8am and on weekends
Shop Now
How to Upgrade Your Gaming PC
If you’re a serious gamer, chances are you know that the computer resources required for great gameplay have changed over time. The memory, processing speed and graphics capabilities that were sufficient to run a game smoothly a year or two ago may not be enough to handle the latest titles.
When you’re ready to admit that your computer just isn’t capable of running that new game you just purchased, you have two options. The first, of course, is to go out and drop hundreds or thousands of dollars on a new gaming machine.
On the other hand, that may not be necessary. Instead of buying an entirely new machine, upgrading some of the computer’s components may be enough to get you back into the action.
When is it Time to Upgrade?
Just like a television, a household appliance or even a car, eventually the components of a gaming PC reach the end of their useful life and are no longer able to handle modern titles.
Of course, the easiest way to determine that your machine is ready for an upgrade is via the gameplay itself. Does the game lag, freeze or crash? Do you need to reduce settings below their maximum to get the game to load? Does the fan on the CPU or graphics card run constantly? Are you considering buying a 4K monitor, but your graphics card isn’t capable of 4K resolution?
If any of these are true, it might be time to consider an upgrade.
Another method of determining the need for an upgrade is by comparing your system to the “minimum resources needed” listed on the box of the game you’d like to play, or by visiting the game developer’s website.
On a Windows 10 machine, you can determine what components make up your computer by right-clicking on the Start button and choosing Device Manager. There, you can find out information about your processor and graphics card. To find out how much RAM you have, right-click on the Start button again, but choose System. This gives you a summary of how much RAM is installed.
If the components on your PC aren’t enough to run the game you’re eyeing, it’s likely time for an upgrade
Another way to answer the upgrade question is by opening the Windows Task Manager and clicking on the Performance tab, or by downloading none of the several free software tools that measure system performance. Any components constantly running at 100% utilization during a gaming session may indicate the need for an upgrade. That’s especially true is one component is running at 100% but others are nowhere near that threshold. If your CPU stays at 100% utilization but your graphics card hovers around 50%, the CPU may be causing a bottleneck that’s slowing down gameplay.
What Does More RAM Do?
One of the easiest and least expensive ways to improve the performance of your gaming PC is by upgrading the memory, or RAM.
Having enough RAM enables your computer to store game data in memory instead of having to constantly swap it out to the hard drive. Some games require as little as 4 GB to run properly, while others require as much as 16 MB. According to Intel, for example, the game Journey to the Savage Planet will run fine with 4GB, while Call of Duty: Warzone calls for 16 GB to get the most out of the gaming experience.
To avoid having to go through the upgrade process a few months down the road, it’s advisable to install 16 GB if at all possible.
The Steps
Knowing how much memory your computer has is only part of the story. To upgrade, you’ll need to know the configuration of your existing memory and what your motherboard can handle.
To find out the configuration of your existing memory you might open the case and have a look to see how many memory slots are filled. Memory chips are typically installed in pairs, and different motherboards have different numbers of slots available.
You might also download one of the free hardware information programs available. There are several available, including Speccy (made by Piriform, the makers of CCleaner). Download the program, run it and click on the RAM tab to see what type of RAM you have, how many slots there are and whether any are open.
Depending on how many slots available, you might be able to simply add another pair of modules, or you might need to swap out the existing modules. For instance, if you have four slots with two occupied for a total of 8 GB, you could simply add two additional 8GB modules to take it up to 16 GB. If you have 8 GB and two slots with both filled, you’ll need to exchange the two existing 4 GB modules with 8 GB ones to take it to 16 GB.
The next part of the process is knowing how much total RAM your computer can support. There are two issues at play: The maximum RAM your version of Windows can handle, and the maximum your motherboard can handle.
When it comes to Windows 10, the 32-bit versions can only handle up to 4 GB of RAM, no matter which edition you’re running. The 64-bit versions can handle up to 128 GB for Windows 10 Home, and up to 2 TB for Windows 10 Pro.
When it comes to the motherboard, you’ll need to check the documentation for your computer for the exact model number. If you don’t have that, Speccy can provide the details. Do a search on your specific motherboard to learn what your options may be.
In addition to the maximum memory your motherboard can support you’ll also need to know the type and generation of memory it accepts. RAM for desktops typically comes in DIMM (dual inline memory) modules. DDR3 (Double Data Rate) DIMM modules are generally found in PCs built in the last 5-8 years, while most gaming machines take DDR4 RAM. The types aren’t interchangeable, so you’ll need to know exactly what your PC requires before making a purchase.
Once you’ve determined the type of memory your computer can accept, the final step in the process is to buy what you need and prepare for installation. If you need to remove the existing RAM, press down on the tabs at each end of the RAM slot until they click. The module should pop up slightly, and you can simply pull it out.
To install the new RAM, first look at the slots. Not only does RAM need to be installed in pairs, the modules need to be installed in matching slots. For most motherboards, the slot pairs are different colors. If you’re installing fewer modules than the motherboard accepts or you have different types (such as two 8 GB modules and two 4 GB modules), you’ll need to install each pair in matching slots.
At that point, align the contacts on the RAM with the slot (they only fit in one way) and press the module gently until the tabs at each end click into place.
Once you’re done, close up the case, boot the computer to ensure the new modules are recognized and get back to gaming!
What Does a Better Graphics Card Do?
Upgrading your graphics card is one of the easiest upgrades you can perform, and one that could deliver the biggest payoff in performance.
A graphics card upgrade offers a host of benefits, including smoother video and higher resolution. In addition, because the card’s onboard memory can handle much of the data processing necessary to create the images you see on the screen, your machine can run faster.
The Steps
When it comes to choosing a graphics card, you’ll have two primary choices in terms of brands: NVIDIA and AMD. You’ll also need to answer some compatibility questions. Does your motherboard have the right kind of slot for the graphics card you want to install? Can your power supply handle the increased power demands? And often overlooked but just as important: Will the card fit in your computer case?
With that in mind:
Verify compatibility: Today’s graphics cards use a PCI-E x16 slot for plugging into your computer’s motherboard, and nearly all motherboards feature such slots. Check your motherboard’s documentation to be sure
Make sure the card fits in your case: Realize that higher-end cards often take up the space of two slots, so if you have something plugged into an adjacent slot or cables that may interfere with the card you’ll need to take that into account. Most full-sized cases can accommodate any graphics cards, but if you have a compact case your choices may be limited. The card specifications should list its measurements.
Make sure your power supply can handle card requirements: Specifications for graphics cards typically last their estimated power consumption in watts. Add to that a 30-40w safety margin, and make sure your power supply has that much available. If it doesn’t, you’ll need to upgrade your power supply. In addition, most cards need a direct input from the power supply, so you’ll also need to make sure you have an available power cable of the proper type. You’ll likely require either a 6-pin or an 8-pin plug. Adapters or splitters are available on the market if you don’t have the proper connector, but they aren’t recommended as a long-term solution.
Once you’ve verified compatibility, the rest is relatively easy. Plug your chosen card into the proper slot, screw it in, install any accompanying driver software and you should be ready to go!
What Does a Better Processor Do?
If your graphics card is only running at 40% but your CPU constantly peaks at 100%, the processor may be creating bottlenecks that slow down the entire system.
If that’s the case, upgrading the processor could result in overall improved performance from your gaming machine. Think of the processor as an automobile engine. An engine that’s only capable of reaching speeds of 70 mph may be enough to get you where you’re going, but it’s nice to have a bit of extra power just in case.
Be aware that there are different types of processor configurations. Before purchasing a processor, you’ll need to verify what type of chip your motherboard can handle. As with RAM upgrades, you’ll need to consult the motherboard’s documentation to be sure.
The Steps:
Swapping out processors is a relatively simple task, but neglecting a step will at the very least result in unsatisfactory performance and at worst damage the processor and/or the motherboard.
Before you begin, you’ll need to have some thermal paste on hand. Thermal paste ensures there is sufficient contact between the processor and the heat sink attached to it. Leave out this step and your processor will likely overheat.
You’ll also need to make sure you have the latest motherboard BIOS software onto your computer. You can determine the BIOS version by booting into the BIOS or via a program such as the aforementioned Speccy program, then checking your version via the manufacturer’s support page. If you don’t have the latest version, you should be able to download and install it from there.
Once that’s done, power down your machine, unplug the power cable and press the PC’s power button to discharge any residual power. Then, open the case.
Remove the heat sink and cooling fan from the CPU and clean them thoroughly. Then, remove the existing processor from its socket. Most motherboards include a lever to release the chip from its socket. Be careful when doing so to avoid bending the pins.
Once you’ve removed the old processor, take your new processor and gently place it into the socket. It will only go in one way, so don’t try to force it. Once it’s in, press down the lever to lock it in place.
Apply a small amount of thermal paste (about the size of two grains of rice) to the center of the top of the new processor and reattach the heat sink and cooling fan. With some motherboards the heat sink and fan clip into place, while in others they screw in. Be sure not to over-tighten them.
Make sure any power cables for the cooling fan are plugged in and you’re ready to reboot! Ensure the computer boots properly and the fan is running before closing the case.
What does More Storage (HDD and SSD) Do?
If your current storage drive is nearly full or programs load too slow for your taste, consider an upgrade. It’s one of the easiest and least expensive changes you can make.
And if you have a traditional hard drive (HDD) with its spinning innards, consider a solid-state drive (SSD).
An SSD drive uses flash memory, so programs load nearly instantly. Because they don’t have any moving parts, they’re more reliable than a traditional hard drive and are better able to handle being bumped or dropped. They use less electricity and run cooler and quieter than a traditional drive. Thanks to their speedier data access, they have improved multitasking capabilities compared to a traditional drive.
On the downside, because SSD drives are a relatively new technology, they can be more expensive compared with an HDD drive of the same capacity.
The Steps:
Installing an SSD drive can be accomplished with little more than a screwdriver and your computer’s owner’s manual. If possible, keep the HDD drive already in your computer as the primary (boot) drive, and use the SSD as a secondary drive. If not, you’ll likely need to download data migration software to transfer your files and settings to the new drive.
Shut down your system and unplug the power cable. As an added precaution, touch an unpainted metal surface before opening the case to discharge any static electricity
Locate the storage bay, referring to your system’s manual if you have difficulty. If the bay is larger than the new drive, you may need a conversion kit
If you’re replacing an existing drive, remove the old drive and disconnect any cables that may be attached to it. If you’re installing it as a secondary drive, use a SATA cable to connect the drive to a SATA connector on your computer’s motherboard. In addition, take an available SATA power cable from your system’s power supply and connect it to the SSD.
Once you’ve made the necessary connections, mount the drive in the bay and close the case. Reattach the power cable and boot your system. Windows should recognize the new drive automatically.
Handling the task
In addition to reading this guide, consult your computer’s documentation as well as that of the component you plan to install. For an added level of comfort, view some of the many YouTube videos that follow someone else performing the same procedure.
If you’re not comfortable with doing the work yourself, check with your local computer shop to see what they charge to do the job. Doing so will hopefully assure that the job is done correctly. And if there’s a problem, you’ll have someone else to blame.
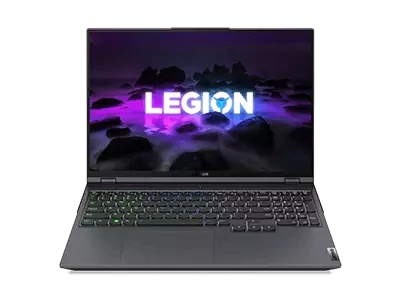
And finally, think long and hard about the value of performing an upgrade versus buying a completely new system. If you do decide to buy a new system, check out Lenovo’s line of Legion gaming computers.
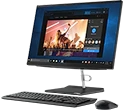
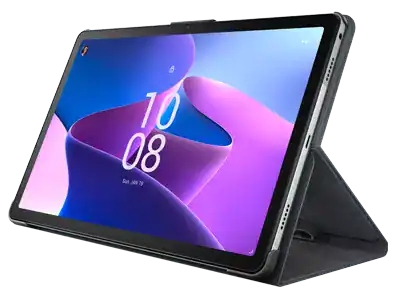
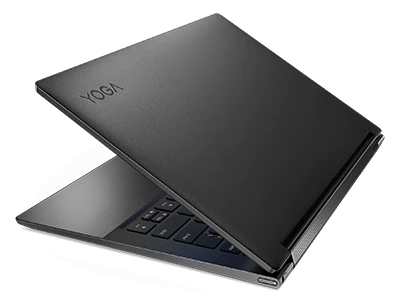
Shop Related Products

Shop Lenovo Intel® Evo™ Certified Products

Read More
Hide more
Read More


CLICK TO REVIEW IMPORTANT INFORMATION REGARDING LENOVO PRICING, RESTRICTIONS, WARRANTIES AND MORE
* The prices mentioned are exclusive of all taxes &octroi
**Actual battery life may vary depending on application usage, settings, features or tasks selected, network configuration, operating temperature and many other factors.
Availability: Offers, prices, specifications and availability may change without notice. Lenovo is not responsible for photographic or typographic errors. Other models are available. Find out more in Lenovo Authorized Retailers Shop.
General System Information: Review key information provided by Microsoft that may apply to your system purchase, including details on Windows 10, Windows 8, Windows 7, and potential upgrades/downgrades. Lenovo makes no representation or warranty regarding third-party products or services.
Pricing: Reseller prices may vary. Lenovo does not set reseller prices.
Warranty: Regional Carry-in Warranty is only applicable in ASEAN countries and China. Lenovo makes no representation or warranty regarding third party products or services.
Trademarks: Lenovo, ThinkPad, ThinkCentre and the Lenovo logo are trademarks of Lenovo. Microsoft, Windows, Windows NT, and the Windows logo are trademarks of Microsoft Corporation. Ultrabook, Celeron, Celeron Inside, Core Inside, Intel, Intel Logo, Intel Atom, Intel Atom Inside, Intel Core, Intel Inside, Intel Inside Logo, Intel vPro, Itanium, Itanium Inside, Pentium, Pentium Inside, vPro Inside, Xeon, Xeon Phi, Xeon Inside and Intel Optane are trademarks of Intel Corporation or its subsidiaries in the U.S. and/or other countries. Other company, product or service names may be trademarks or service marks of others.
open in new tab
© 2024 Lenovo. All rights reserved.
© {year} Lenovo. All rights reserved.
Enter Email to receive valuable updates
Please enter the correct email address!
Email address is required
Select Country / Region:

Please select a Country / Region
- ABOUT LENOVO
- About Lenovo
- News
- Investor Relations
- ESG
- Legal information
- Jobs at Lenovo
- Product Security
- PRODUCTS
- Laptops & Ultrabooks
- AI PC
- Workstations
- Desktops & All-in-Ones
- Servers & Storage
- Product Recalls
- RESOURCES
- Where to Buy
- Blogs & Forums
- Glossary
© 2024 Lenovo. All rights reserved.
© {year} Lenovo. All rights reserved.
×